
HOW TO DO A "MUD TROWEL TEXTURE"
The problem with perlite is that it's hard to put on unless your using some kind of a spray rig. If you try to use a paint roller to apply perlite there is a good chance you will leave noticeable roller lines.
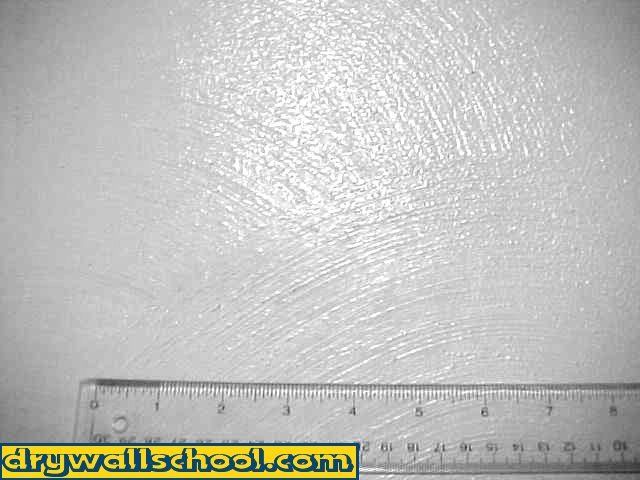
By using a fat brush and doing swirls you won't need a sprayer, you won't leave roller lines and best of all "sand swirl" looks great.
Tools
The only tool needed is the brush itself.
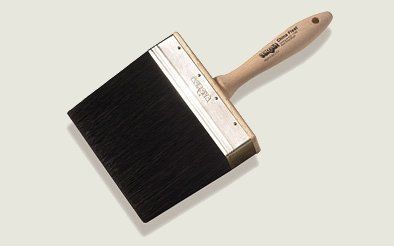
I use a CORONA 7" like the one below. The picture on the right shows the same brush after a couple years of abuse.
You can find a wide brush at any of your superstores or paint and drywall supply stores.
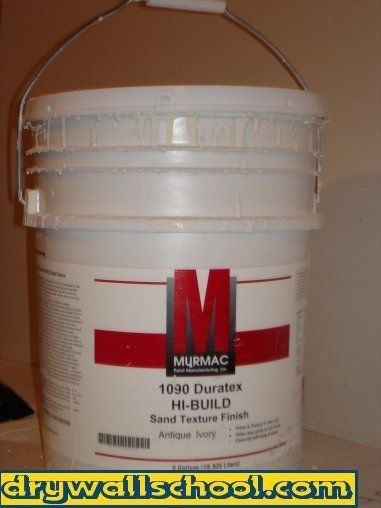
Perlite
Perlite is a type of primer with the sand already mixed in. I am lucky because here where I live we have a local company that makes perlite. I know that the superstores also carry their own brands and types of perlite.
If they look at you like your crazy when you ask about perlite, just try saying "primer with sand mixed in"
One 5 gallon bucket will cover roughly 12 to 15, 4' x 12' sheets of drywall (600-800 sq feet.)
Make sure to have your perlite shaken or mix it up good before proceeding.
How to hold brush
If you try to use the handle, making the swirls is going to feel awkward. Get your hand right on the brush itself for more control.
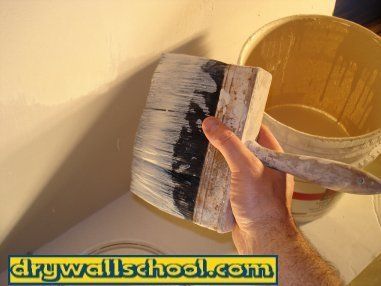
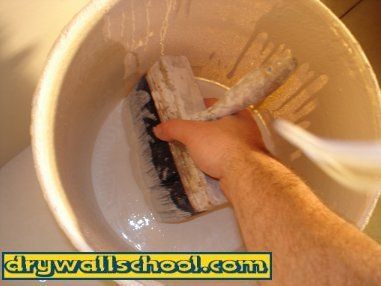
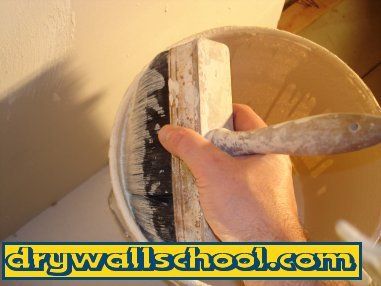
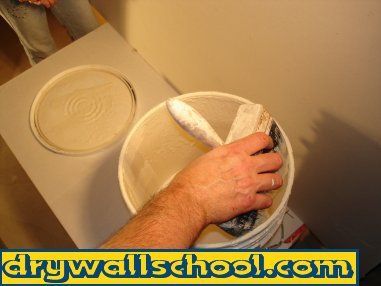
Step 1: Dip It
I will show you how to do this so you are not dripping all over the place. Dip the brush a few inches into the paint. As you pull it out, give it a quick wipe on each side of the bucket. Now you will have a fully loaded brush ready to so some action.

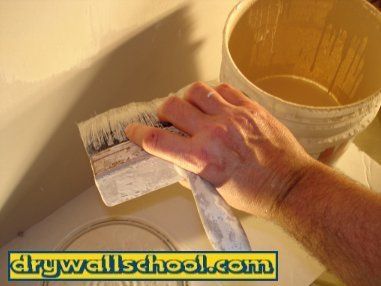
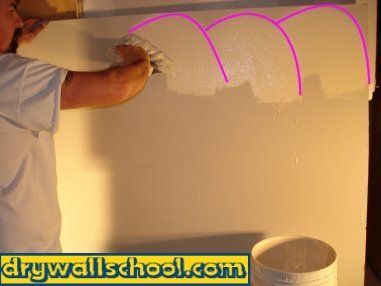
Step 2: Start Swirling 1st Row
The trick with swirls is that every row of swirls covers up the bottom of the last row. So what your doing is making big loops with the bottoms open. When you come through on the next row, the top of the new row of swirls will cover up the bottom of the last row of swirls.
Always start at the very top of the wall. If your doing a ceiling start on 1 end.
Your swirl design is up to you. You can go really slow and try to make perfect circles. Or you can go crazy fast and make a abstract funky creation.
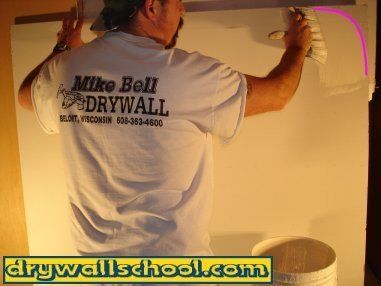

After every swirl, re-dip the brush (Load it up) before the next swirl
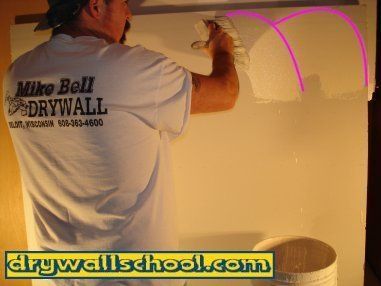
Work your way down the 1st row
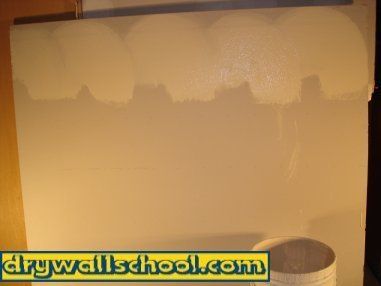
I'm using a chunk of sheetrock here so my rows are only about 5 feet long. Even if you are doing a long wall try to only do about as much as I'm doing.(4 or 5 foot sections from ceiling to floor)
This way the paint is still nice and wet as you work your way down the wall. If your rows are too long. The paint will start setting up before you get to the next row.
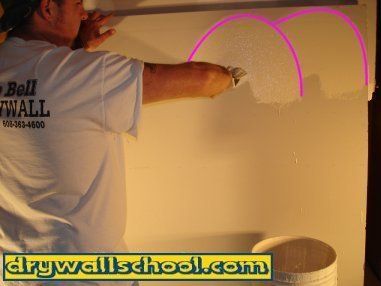
Step 3: Start Swirling 2nd Row
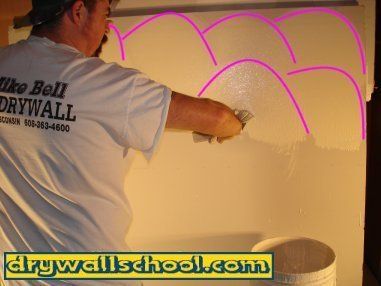
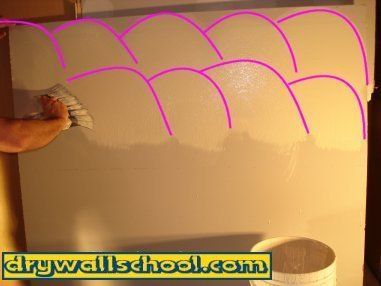
Start your 2nd row. See how your looping over the bottoms of the 1st row ?
One dip per swirl. When you finish the 2nd row, move on to the 3rd. Just keep working your way all the way down to the floor.
When you get your 1st section complete, move down start another until you finish your project.
Here is a Video
Drywallschool.com grants you permission to view this Site and to print individual pages from this Site for your own personal, noncommercial use, provided that you agree to and accept without modification the notices, terms and conditions set forth in this agreement. You may not modify, copy (except as set forth in the preceding sentence), distribute, transmit, display, perform, reproduce, publish, license, create derivative works from, transfer or sell any information, material, software, products or services from this Site.