
HOW TO DO A SLAPBRUSH TEXTURE
In Wisconsin, we call it "Slap brush". I have also heard it called "Crows Feet", "Stippling or Stippled", "Mopped", "Chicken Scratch", "Panda Paw" or "Stomped Ceiling".
This texture has been around forever. When it 1st came out, It was real thick and ugly. Yuck!!. Today the trend is thin,
To me, that really looks the best. I love this texture and try to push it when ever I can.
It dries pure white and looks great even unpainted.
If you're going to slap brush your ceiling and you don't want to paint it, make sure to use all the same brand of joint compound. If you mix two different brands, it might dry in two different shades of white.
You can decide how thick or thin you want it simply by how thin you mix your mud.
If you are doing an old ceiling: Mask Off Walls
This step is for those of you who are doing an existing ceiling in your home, get yourself a 9" masking machine. Using a crate, stilts, ladder or anything to stand on, work your way around the room masking off the walls and any light fixtures.
You can now jump right to step 2


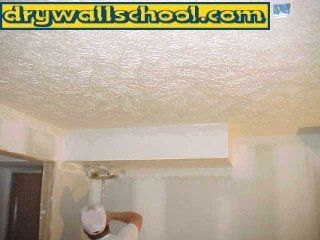
Here is the ceiling we are getting ready to texture

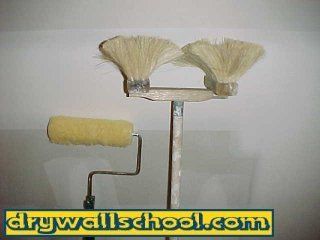
Tools
You will need a paint roller, a slap brush or crows foot brush and 2 poles. I like to use a 3/4" nap roller skin, you could use a 1/2" if you want.
The brush ?? You can go with a round single, double, Each kind of brush changes the look of the texture.
I prefer the regular old double header.
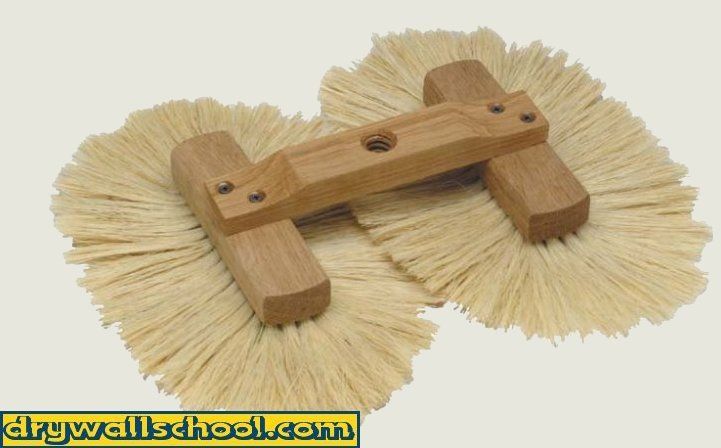
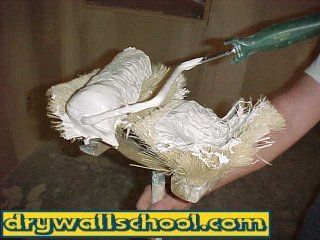
The Picture below shows what a new brush looks like (On the right). The picture on the left shows what the brush will look like after it's been used.
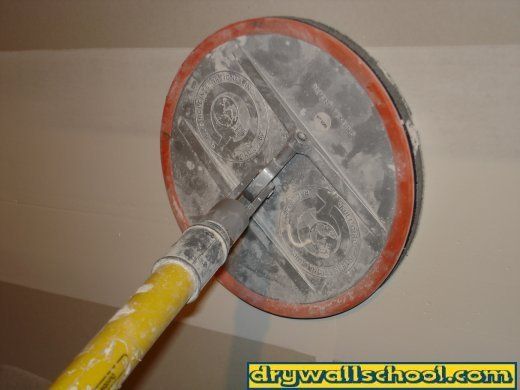
Step 1: Sand
Using a sanding pole work your way around the room sanding off any edges, goobers, lines.
I like the new round sander made by Full Circle International . INC
Not only does it remove more material faster, It really makes your joints flat.
A regular square sander might make a butt joint smooth but it will leave it humped.
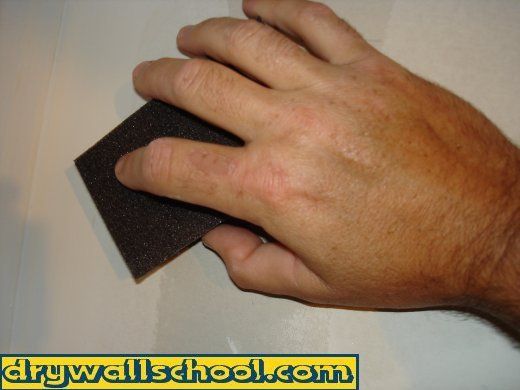
A medium sanding sponge works great for your angles, corners and detail work.
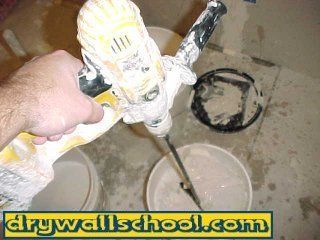
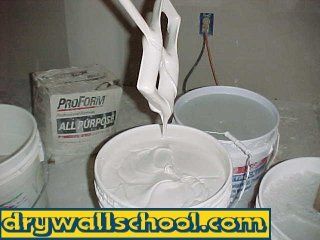
Step 2: Mix Your Mud
Mix up your mud using a mud masher (Stomper) or an electric drill with a paddle. Add as much water you need to get the mud thin (Like Pancake Batter). Usually one box or bucket of joint compound will do one good sized ceiling. For more about mud and how to mix it, click the link below.
Thinner mud will give you a thinner more appealing smooth, rounded edge on your texture. "Thin to Win" is a little phrase that will help to keep that in your mind. Thin is the trend today. Thicker mud will give you a thicker, more of a sharp edge, kind of gaudy, stalactite look. I call it the 70's look.
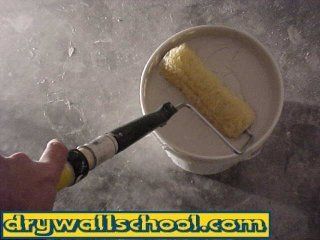
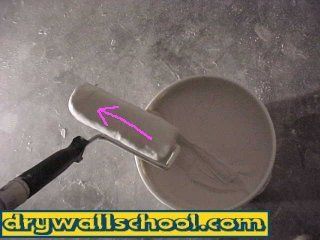
Step 3: Dip It, Shake It, Slide It
Here is a video
Dip your roller all the way into the mud, when you pull it out, shake it a little bit. Now slide it across the edge of the bucket. You want to end up with a nice roller full of mud but, you don't want it dripping all over the place. If you do this right, you won't have mud goobers hitting you in the face when you're rolling.
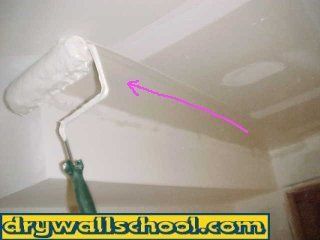
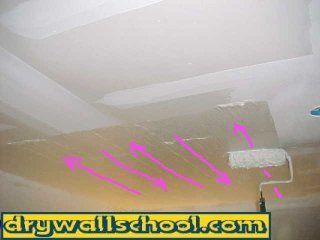
Step 4: Roll Outside Edges
Starting in the corner roll out the mud until the roller is empty. As you can see from the picture, one roller full will get you about 6 to 8 feet. Now re-dip your roller and roll out the other side starting in the same corner.
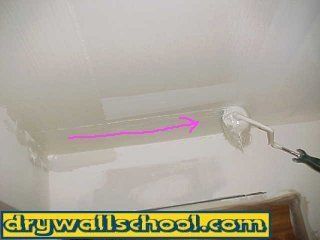
Step 5: Roll Out Each Row
Your next roller full of mud will go the next row over (See Picture). Start on the right side and roll it to the left. The next row, start on the left and roll to your right. By switching every row it makes the mud even. This will make the texture more uniform.
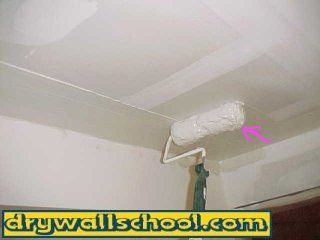
Step 6: Cross it the other way
Once you have your big section all rolled out. Roll over it again the opposite direction.
You are not adding any more mud, you're are just crossing over it to make everything nice and even.Dip your roller all the way into the mud, when you pull it out, shake it a little bit. Now slide it across the edge of the bucket. You want to end up with a nice roller full of mud but, you don't want it dripping all over the place. If you do this right, you won't have mud goobers hitting you in the face when you're rolling.


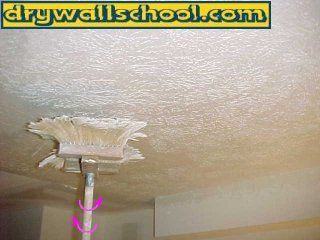
Step 7: Butter Up Your Brush, Start Slapping
Using the roller apply a generous bed of mud on the face of your slap brush. This is only done when you are first starting with a dry brush. You don't have to put mud on the brush for each new section. Now for the fun part, start slapping. I usually do a little in the middle just to break the brush in. Go along the outside edges first. Don't let the brush slide too far down the wall, you will have to wipe the walls clean so the less mud on the walls the better..

Step 8: Rotate The brush
Make sure to keep the brush spinning with every slap go left and right, up and down. Hit the ceiling pretty hard. If you hit it too soft mud will build up on your brush and before long, it will get bery heavy. If you hit too hard you might start popping screws on the ceiling. If you don't rotate the brush you will get some noticeable patterns going. You don't want that..
Smack, Spin 1/2 turn, Smack, Spin 1/2 turn. The spin happens while the brush is in space. Don't spin it while it's touching the ceiling.
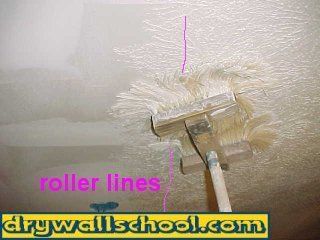
Step 9: Slap away any edges
Make sure not to leave any edges on the outside of your section. Any noticeable roller lines that are not slapped away might show through your finished ceiling.
That should be it for your 1st section. Don't over slap it but slap it enough to even it all out.
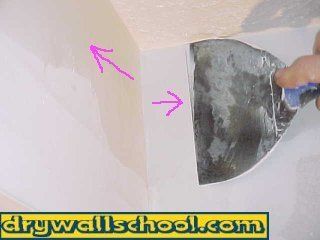
Step 10: Wipe Angles
I am pretty fast at this. I usually wipe my angles after the whole ceiling is textured.
You are a rookie and probably a little bit slower, I would suggest that you wipe your angles after each section.
This way the angles won't dry out.
Start by taking a six inch taping knife, dip it into the same bucket of mud you're texturing with. Get a little bit of mud in your drywall pan. Now apply a light bed of mud right up there in your angle close to the ceiling. Don't go into the ceiling.


Pull your knife across the angle wiping off all the excess mud. This take a little practice. If you find yourself leaving little lines in the ceiling, get out your finger tool it do a little finger stomping.

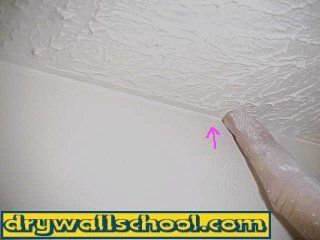
Wipe your corners form the inside out. Try your best, You can always do a little sanding after it dries.
One Section Done!
Step 11: Next Section
That's pretty much it. Keep working your way around the room doing manageable sized sections at a time. Don't leave any edges to dry out and you should be in great shape.

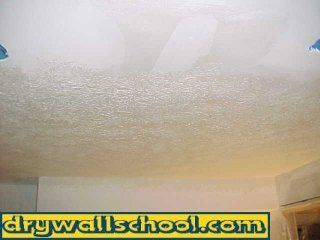
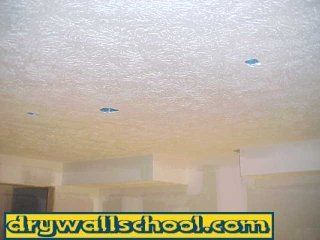
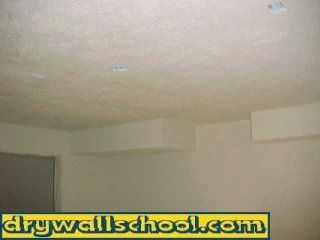
One Ceiling Done
Here you see a picture of the complete ceiling along with a picture of the same room after the whole room has been painted.
Patches??
I get a lot of e-mails asking about how to blend patches when doing a slap brush..
The hardest thing about patches is that there will be like a sharp edge or line where the old meets the new.
If you can make that edge go away your patch will turn out much better. This is a trick my dad showed me.
Hang, tape and 1st coat the patch. After you 2nd coat the patch, right then while the mud is still wet, take a wadded up piece of plastic (like a plastic bag) and kind of tap on that outside edge (kind of like a pre-texture to the real texture) but only on that edge. This way after it dries, the edge is already blended in.
Questions that I receive?? (might help if your having problems)
Problem: Roller Won't Spin
Good Morning Mike, Over the weekend, I successfully textured my existing ceiling and new wall. I went by your directions, and it turned out great. I have some more texture work to do in the near future and wanted to ask you a few questions. I was using a ¾” nap roller to put the texture on. When I would dip it, shake it, and slide it, I would have trouble in initially rolling, it would smear for a little, and then begin rolling. I would roll the thicker smeared area and thin it out. It would work out ok. The roller appeared to be full after I shook it and slid it. Is the problem created by the mud being too thick? I would appreciate your suggestions.
Thanks, Steve D. Hodges
It's either a real cheap roller or the mud is too thick, mix it a little thinner yet. You might have made it what you thought was thin? It might be so thin You're worried you made it too thin, trust me, you didn't,
"When it's nice and thin, the roller will spin" ....Mike